Introduction Features Examples GUI Assembly Paper Community

VibraForge

A minimal, modular, and scalable toolkit for creating spatial vibrotactile feedback systems. Supports up to 128 synchronized actuators with per-unit microcontrollers and a clean BLE control pipeline. Built for haptics research, VR, robotics, accessibility, and rapid prototyping.

Read Paper →

Features

Minimal hardware, modular architecture, and expressive tactile capabilities — designed for rapid R&D and premium user experience.

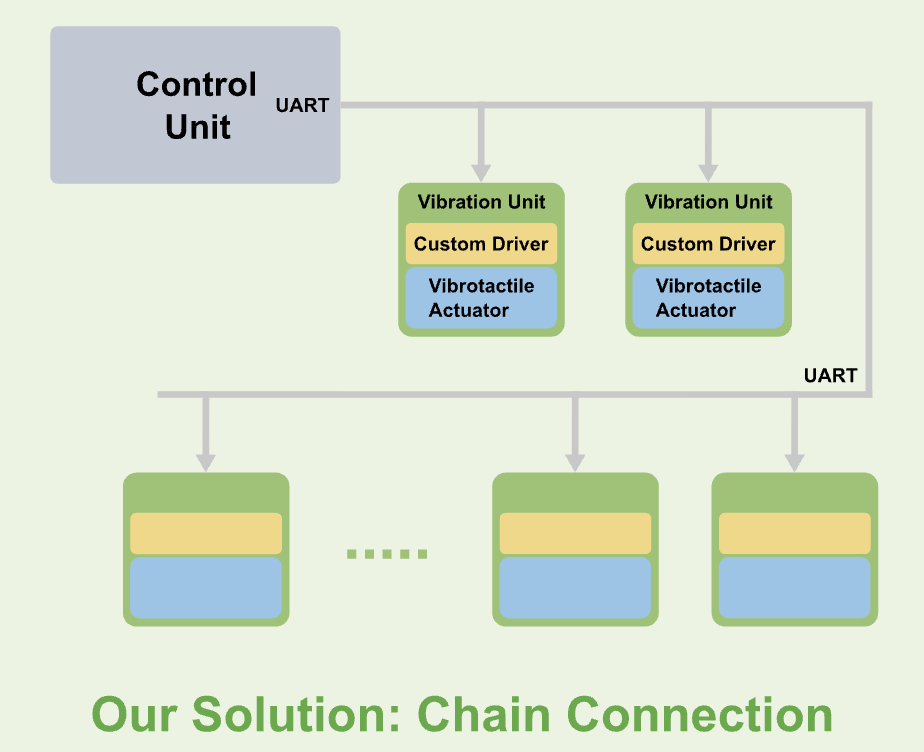
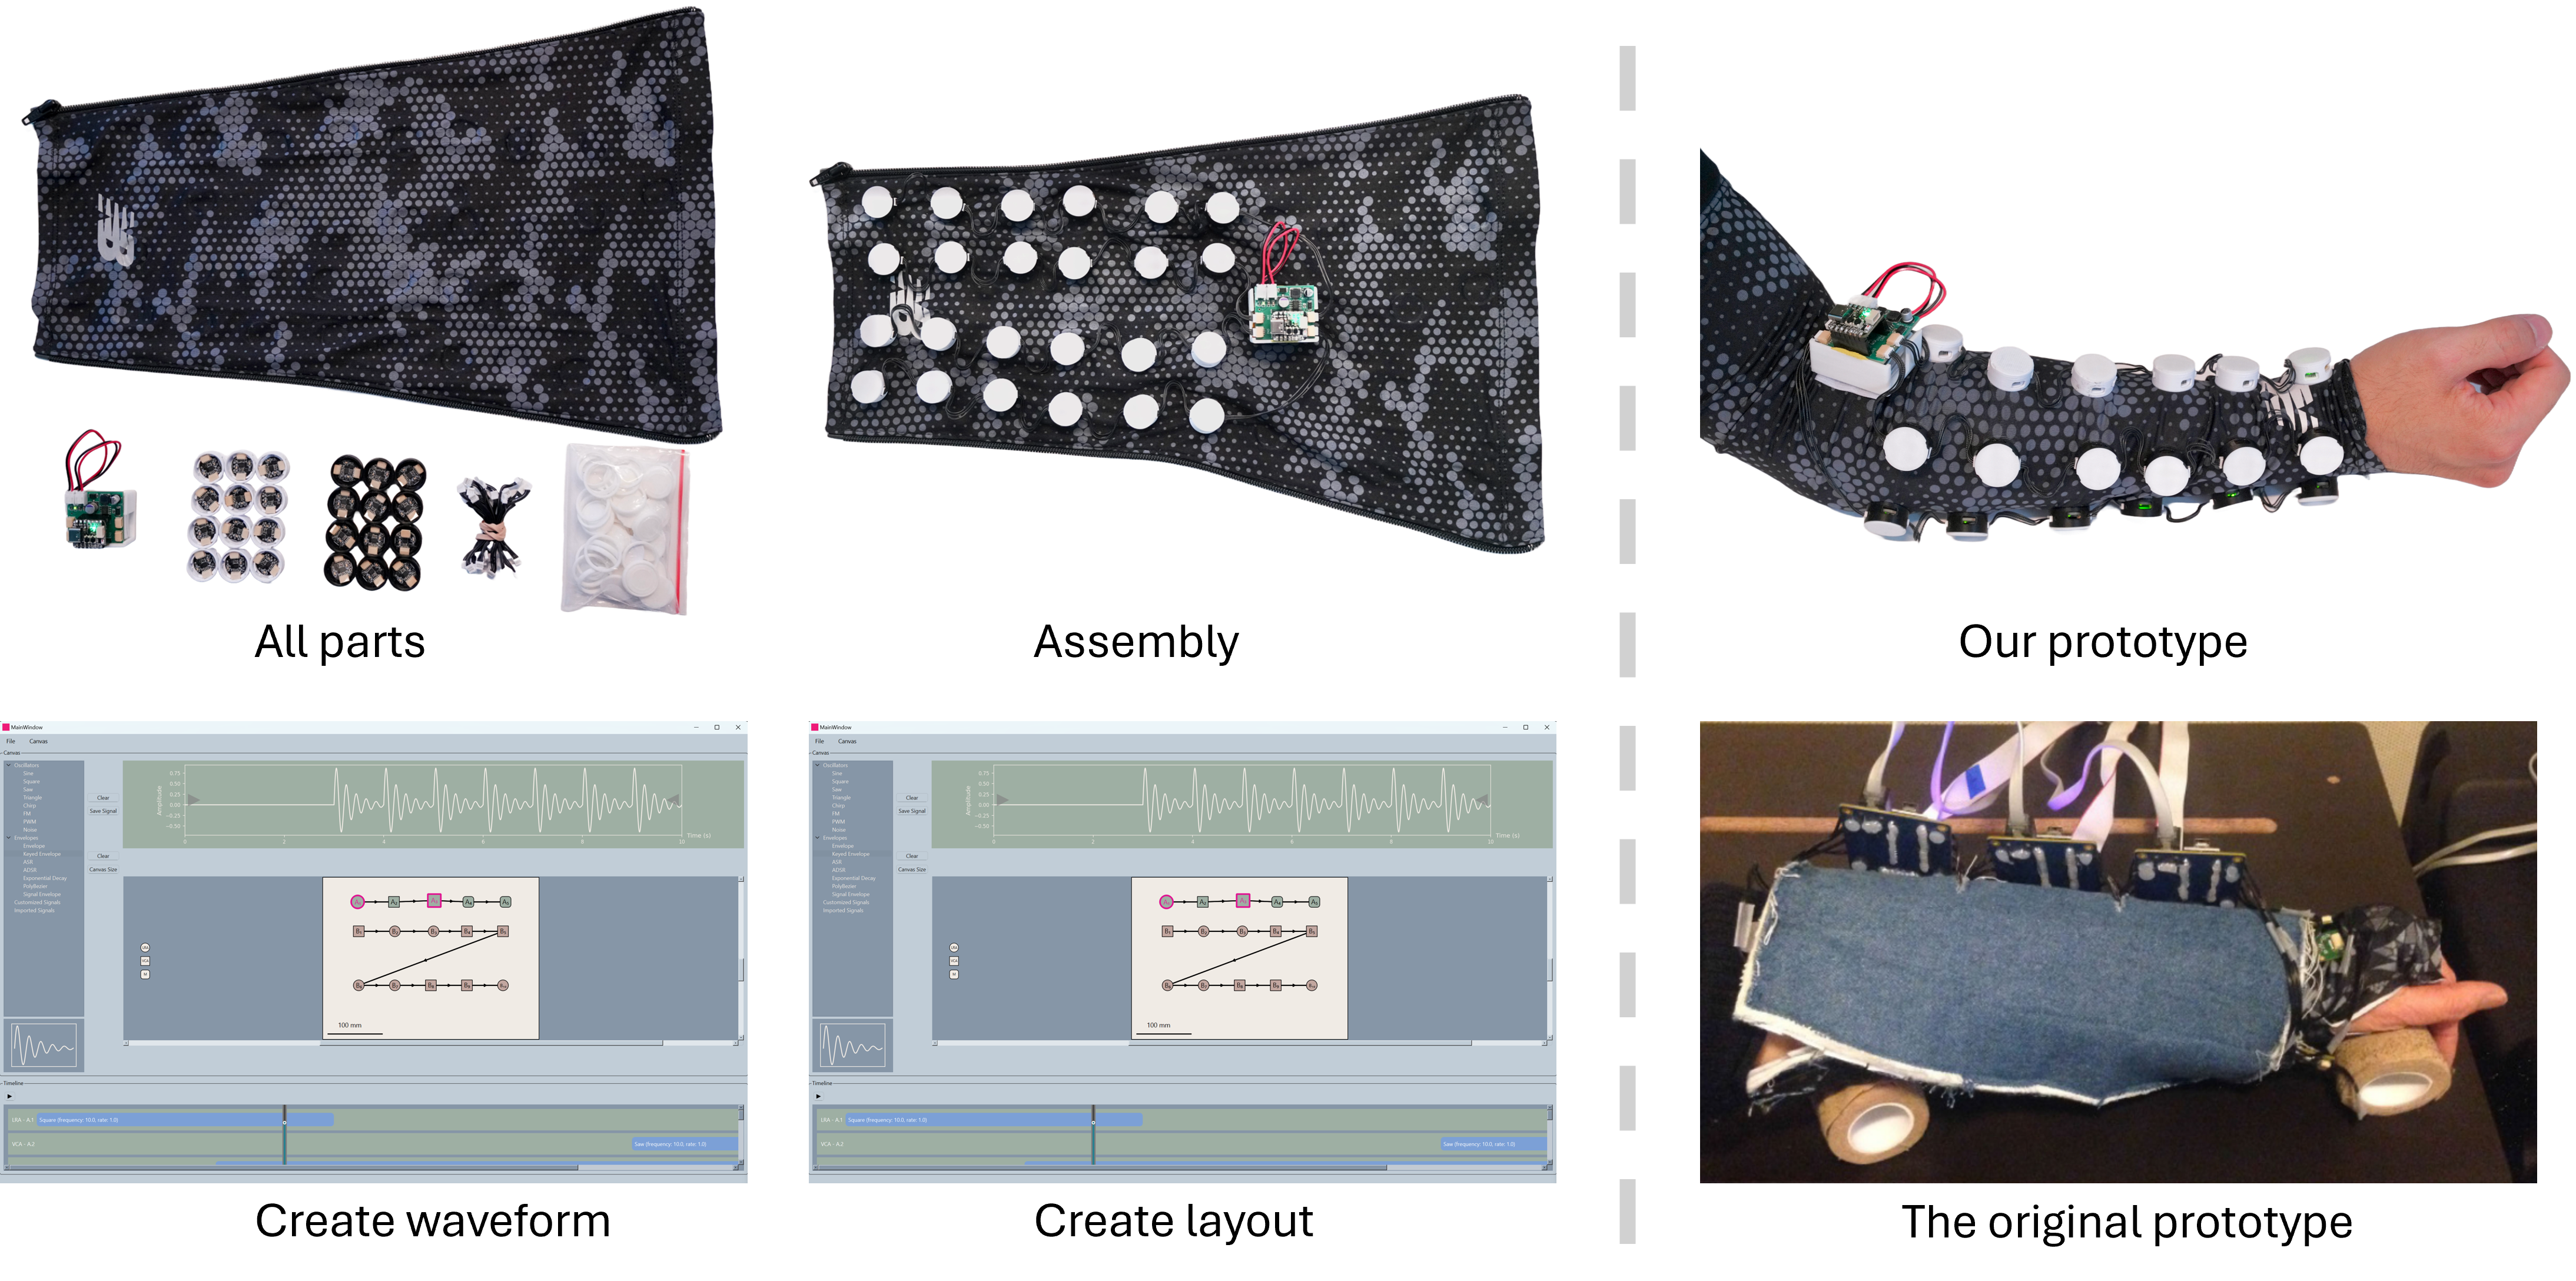
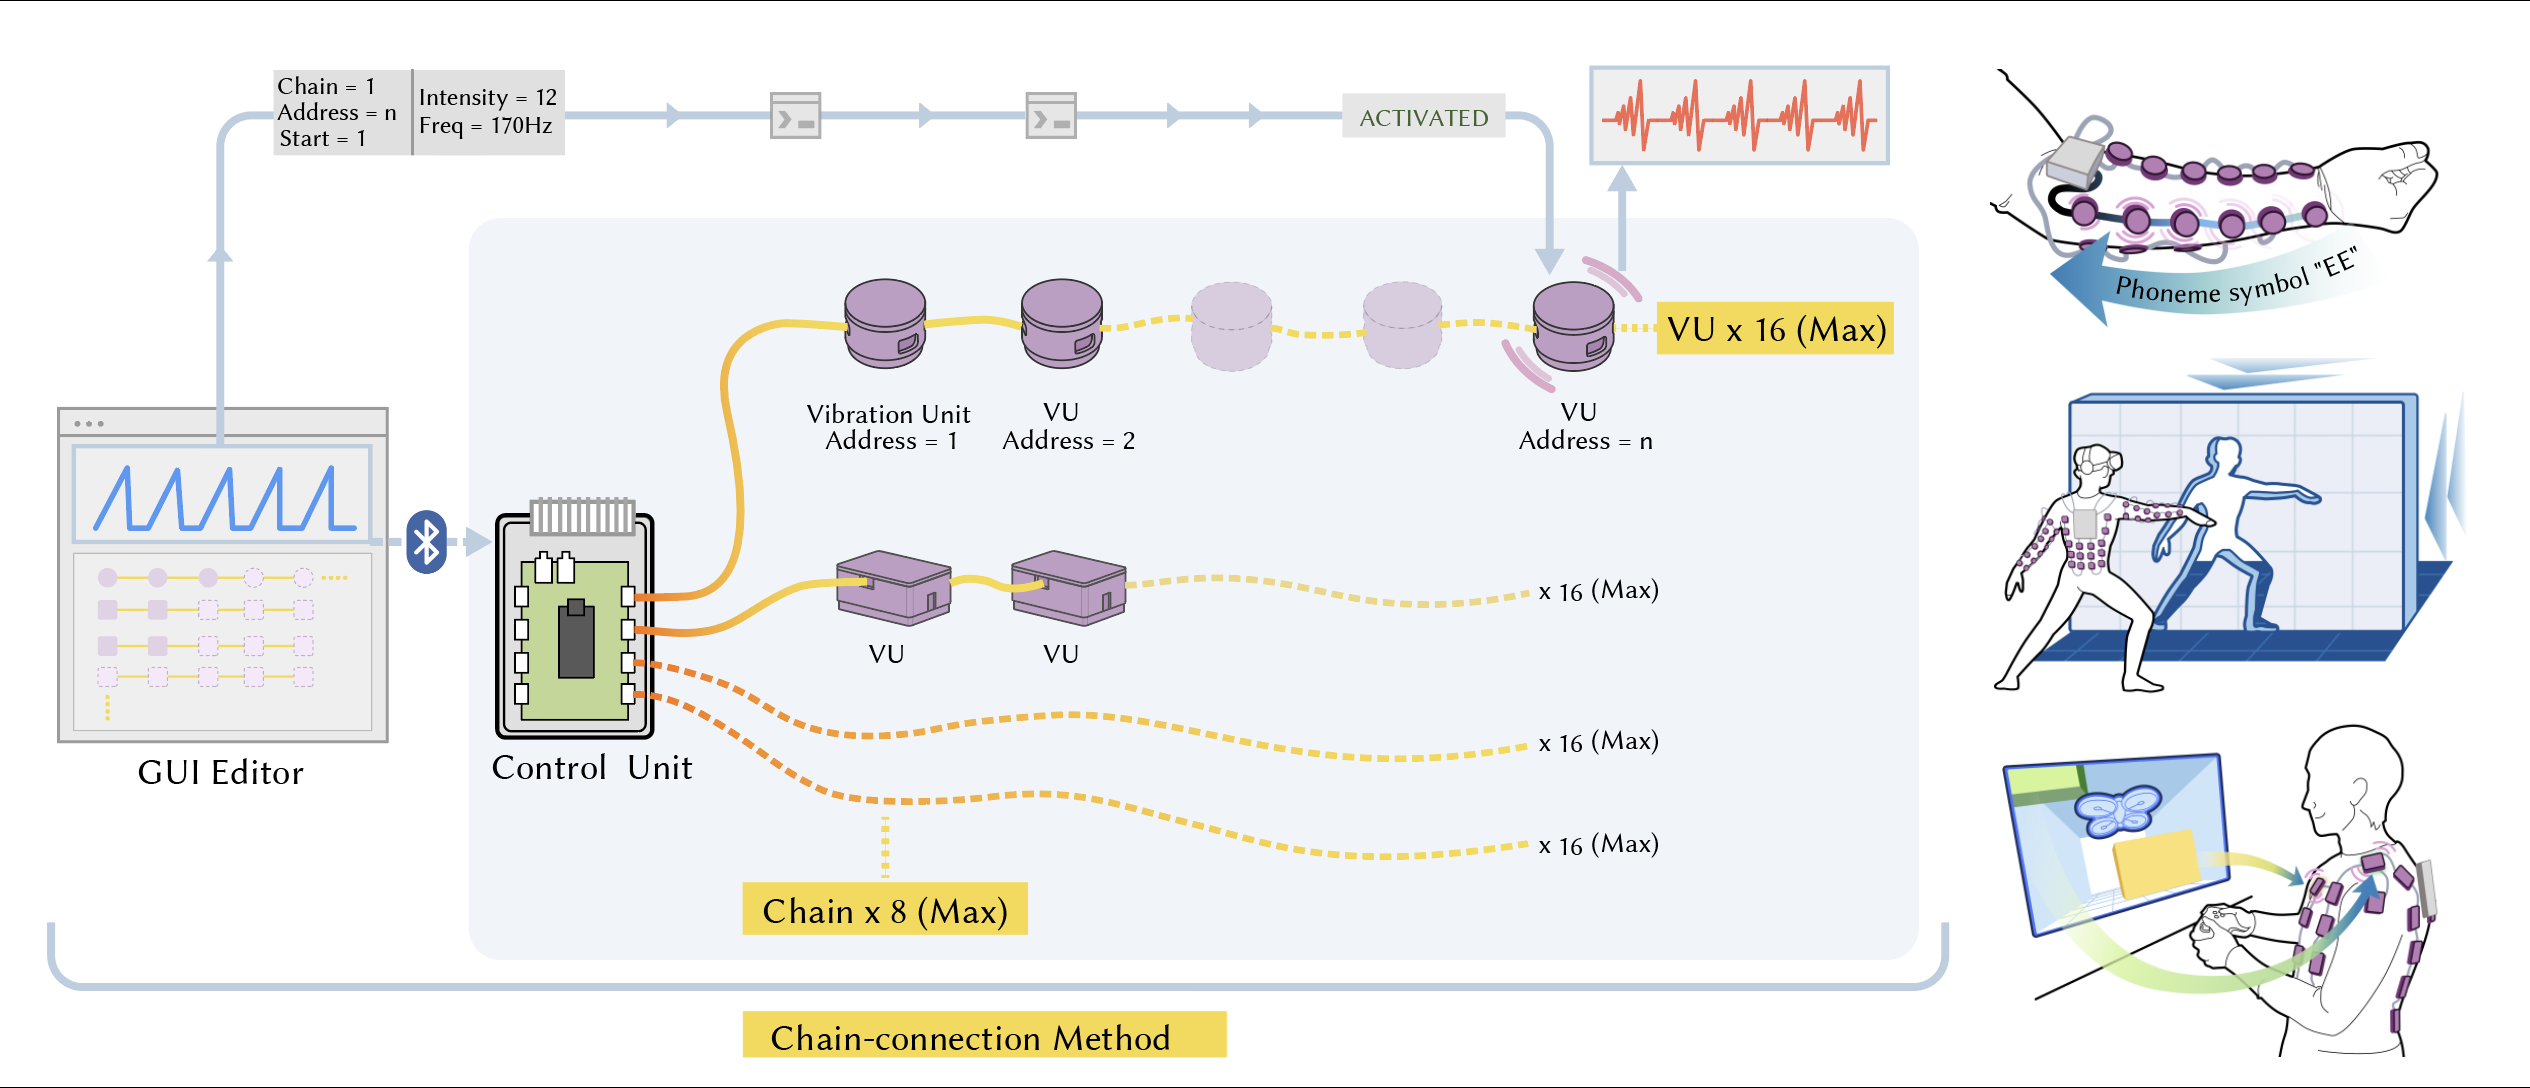
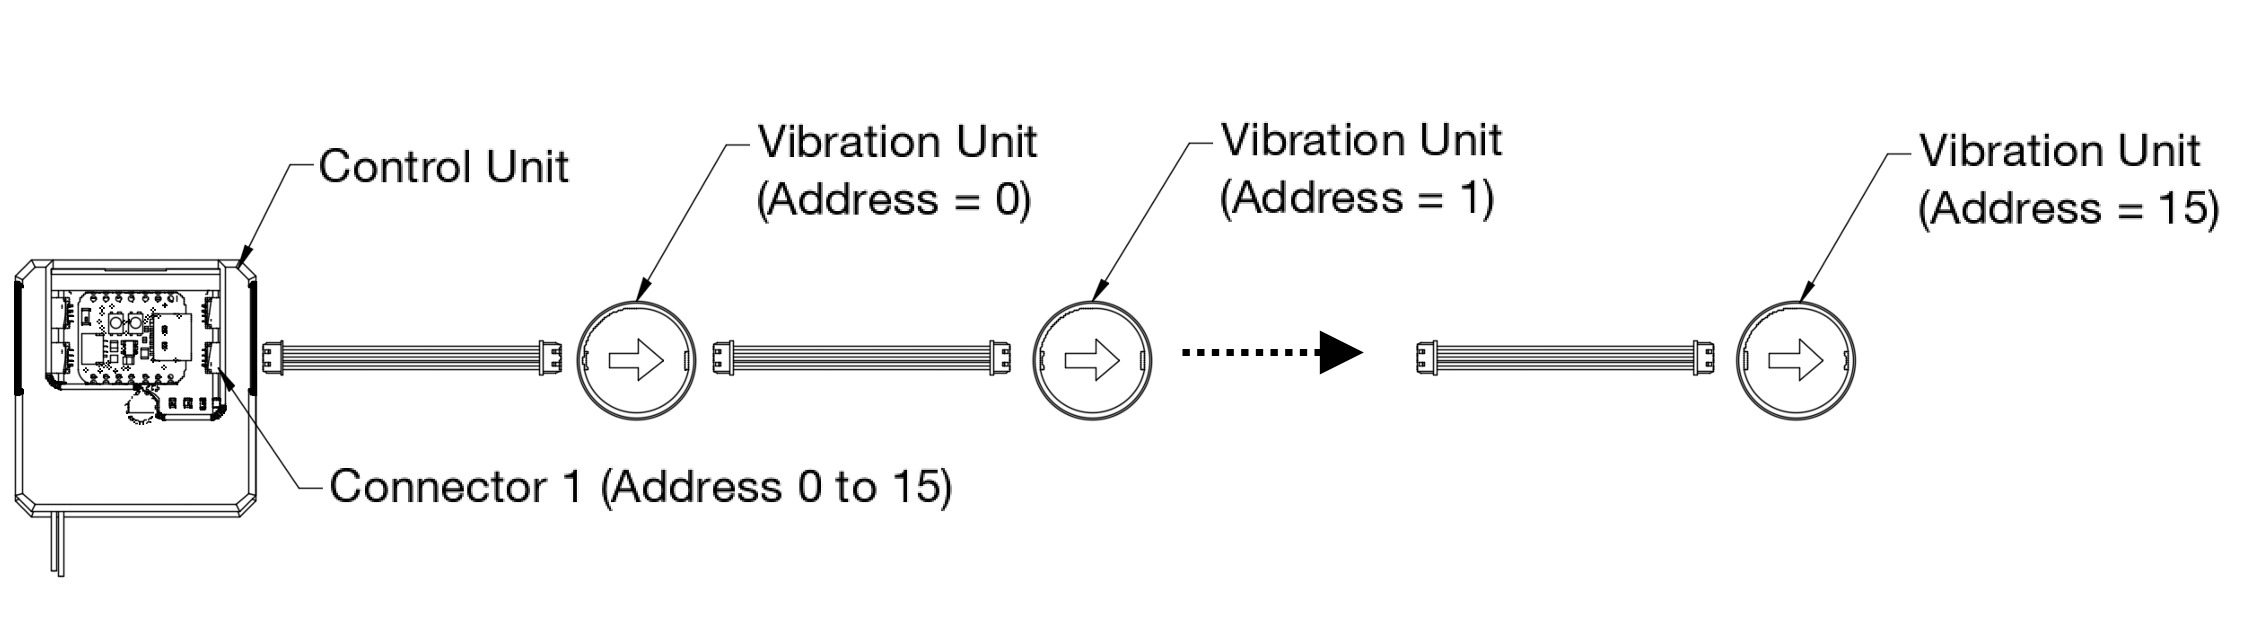
128-Actuator Architecture

8 chains × 16 units each — clean, scalable, modular.

Per-Unit Microcontrollers

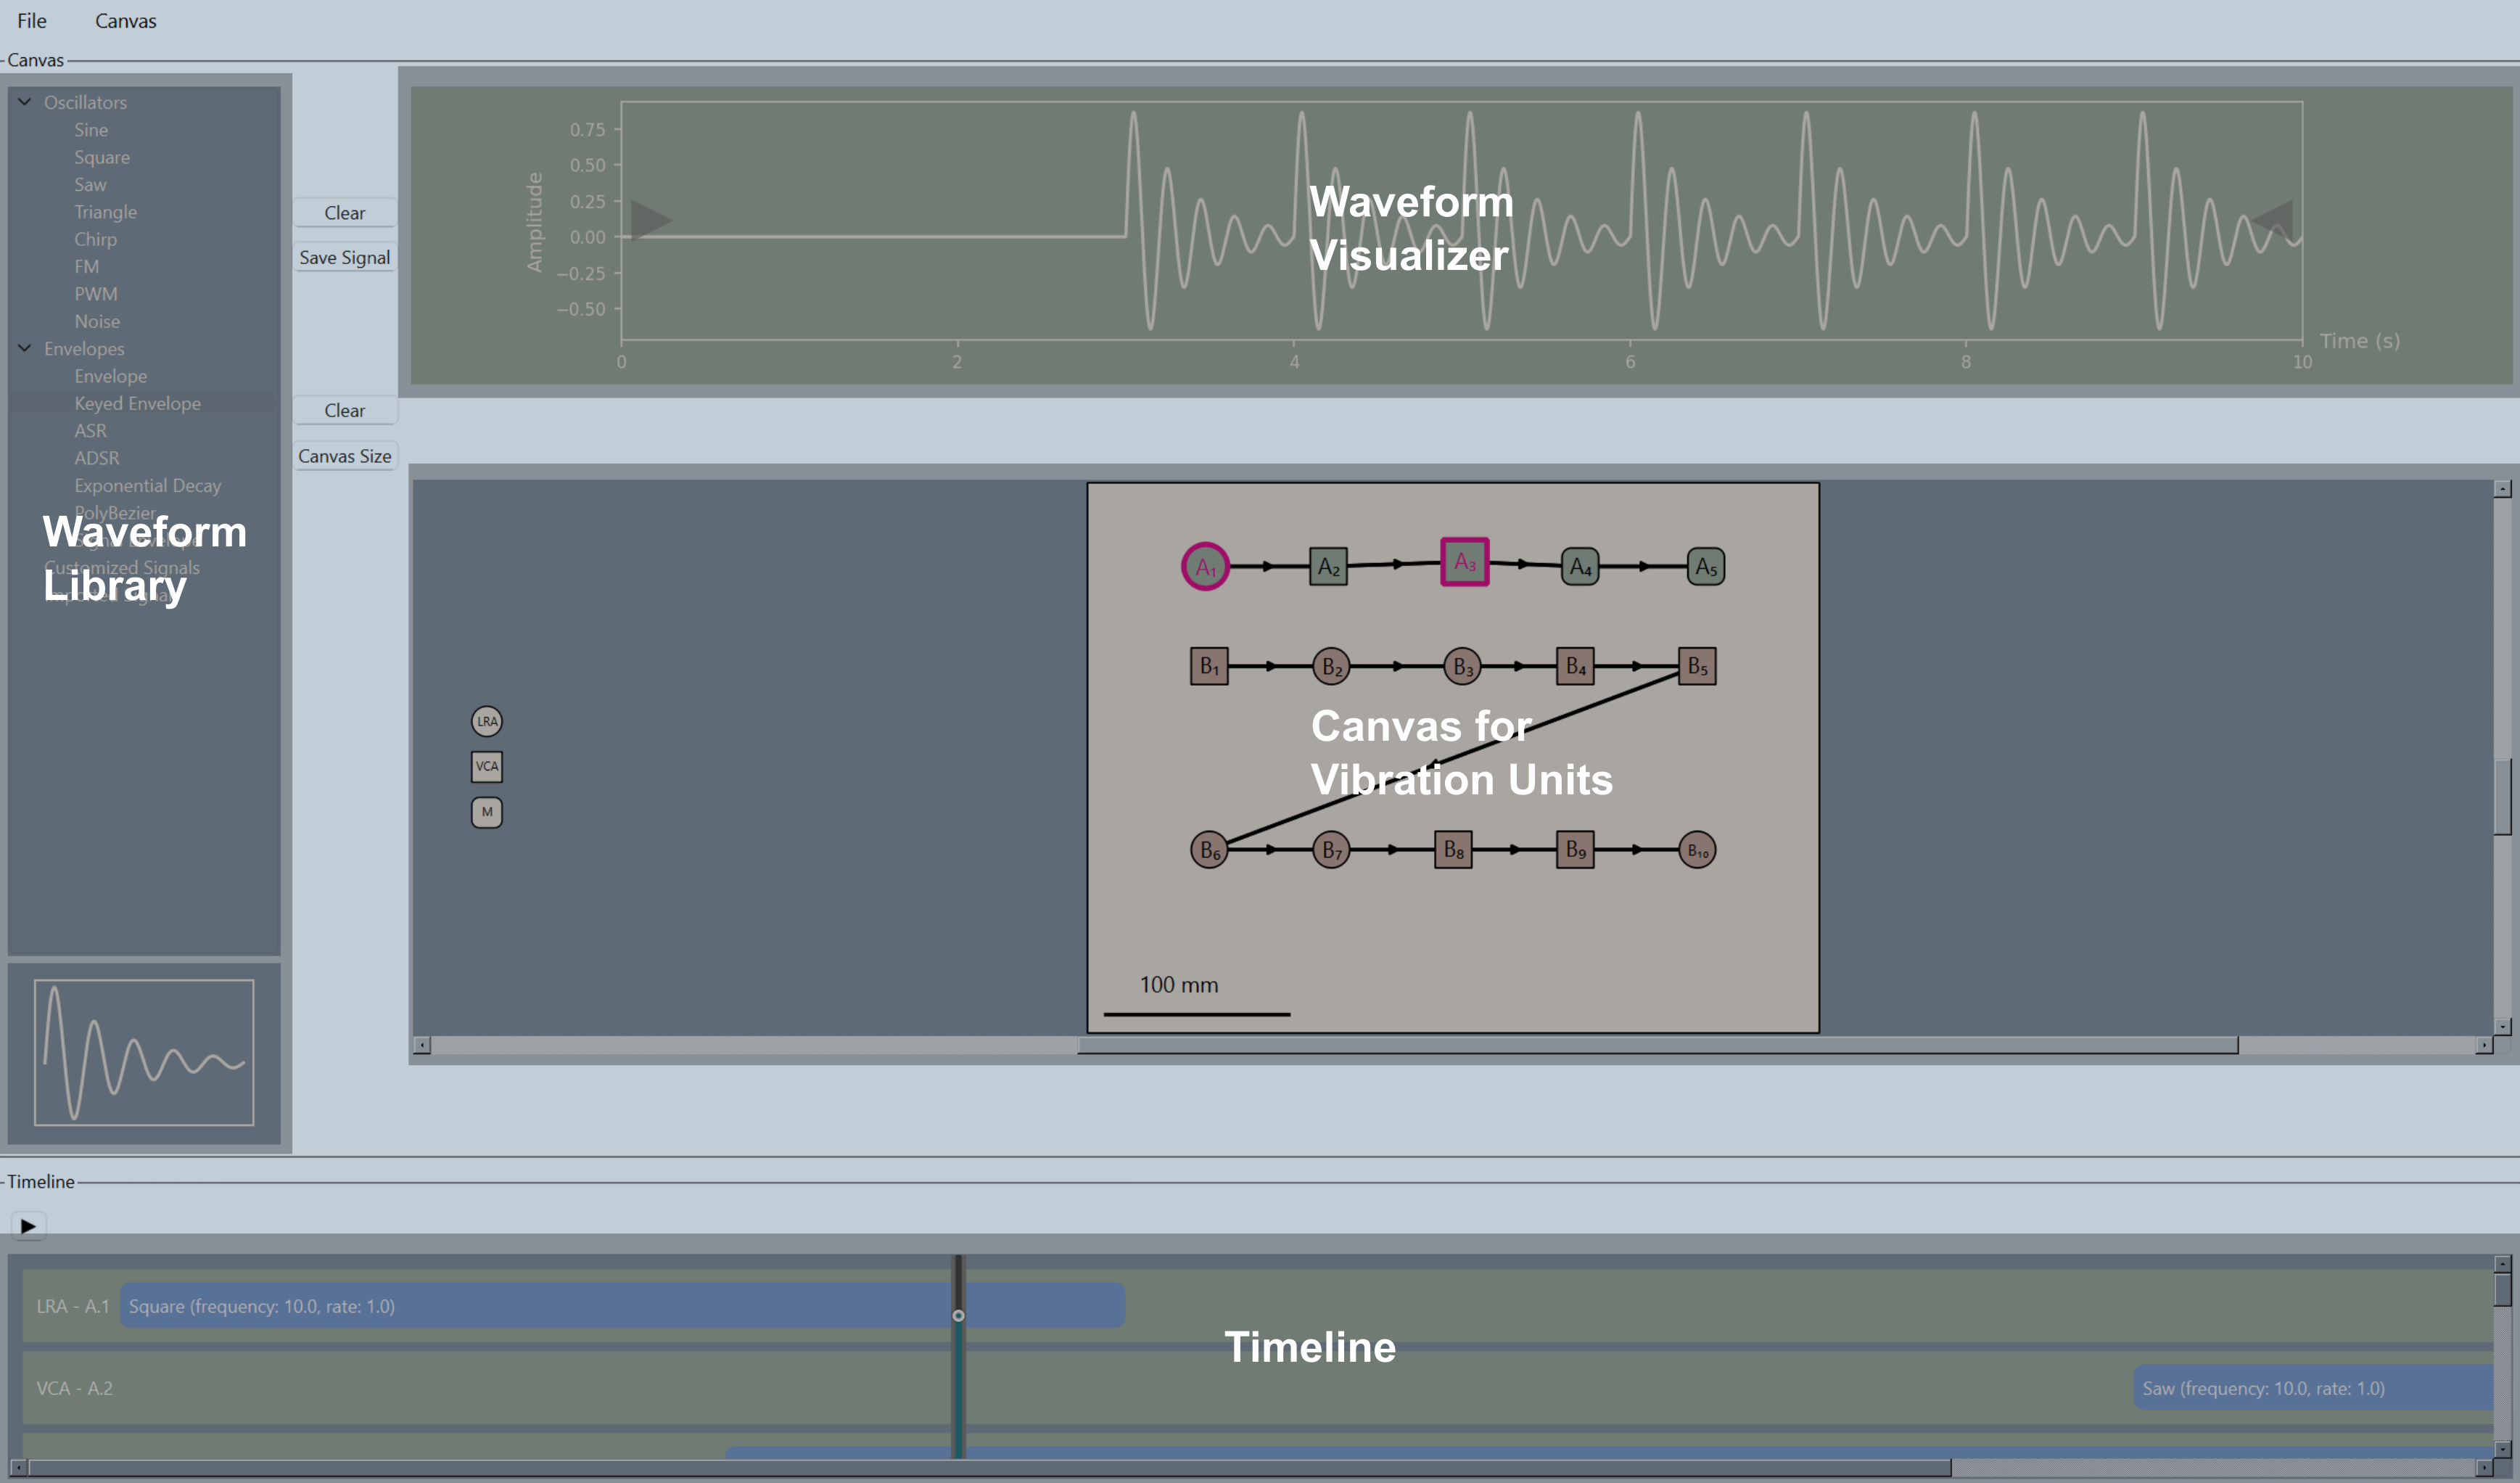
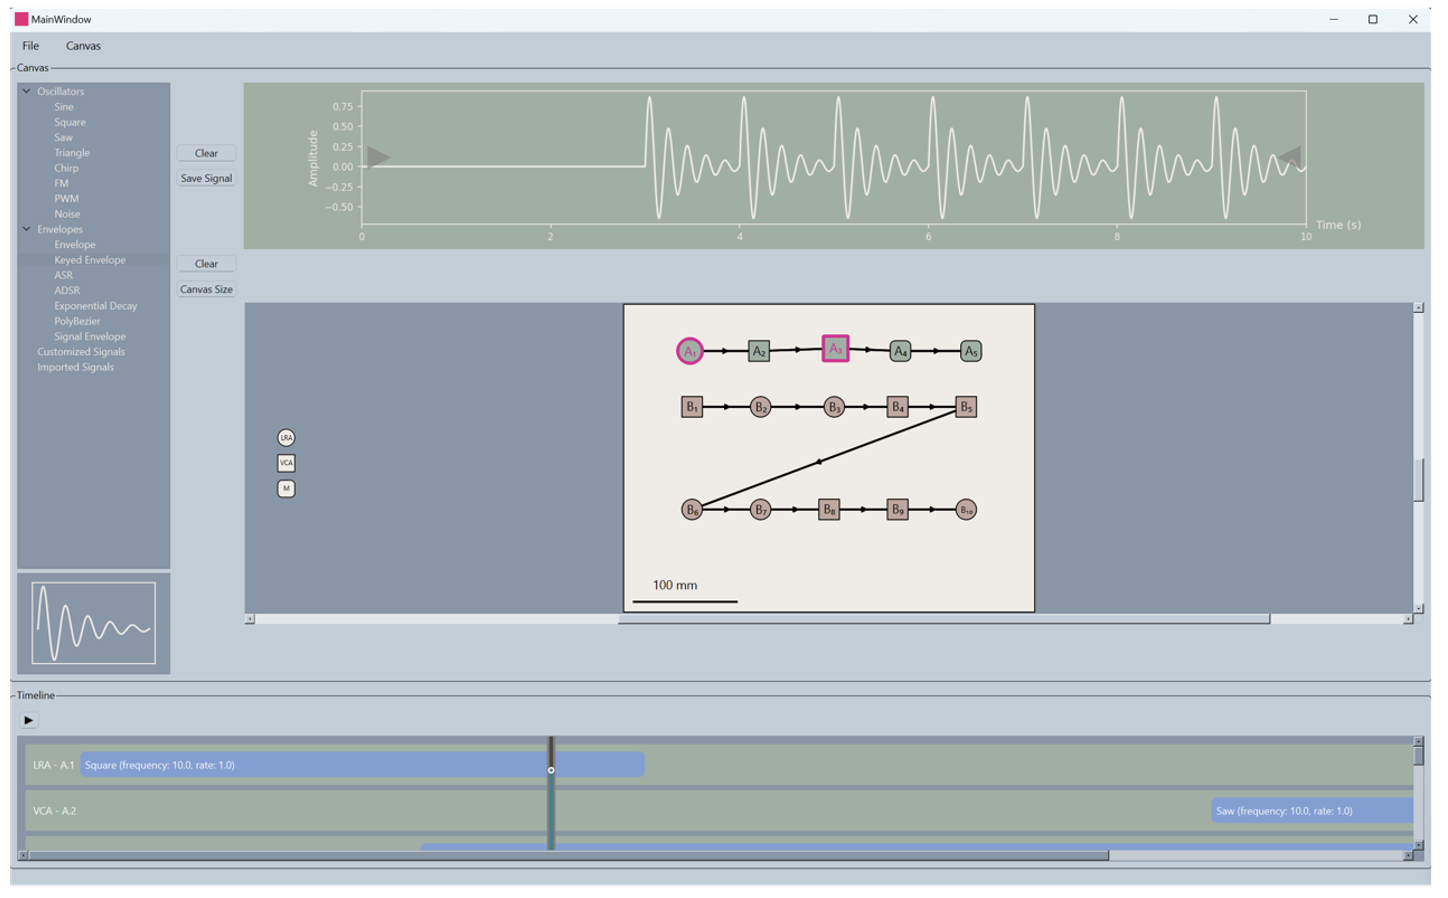
Local waveform synthesis for crisp timing + low latency.

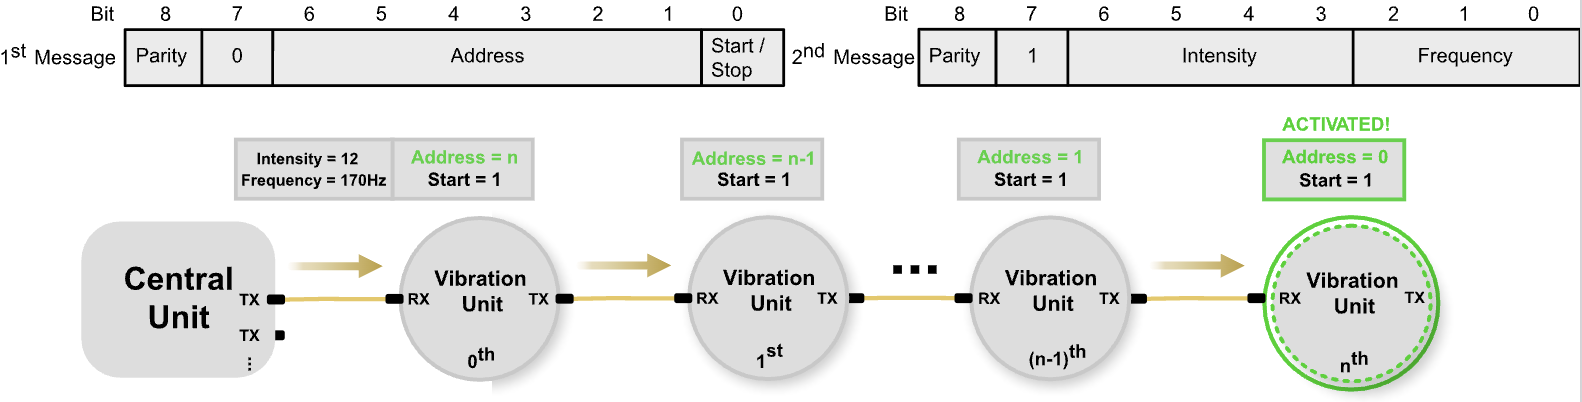
Fine-Grained Frequency & Intensity

16 intensity levels + multi-band frequencies for expressive patterns.

BLE + UART Hybrid Pipeline

BLE for high-level patterns; UART for chain-level distribution.

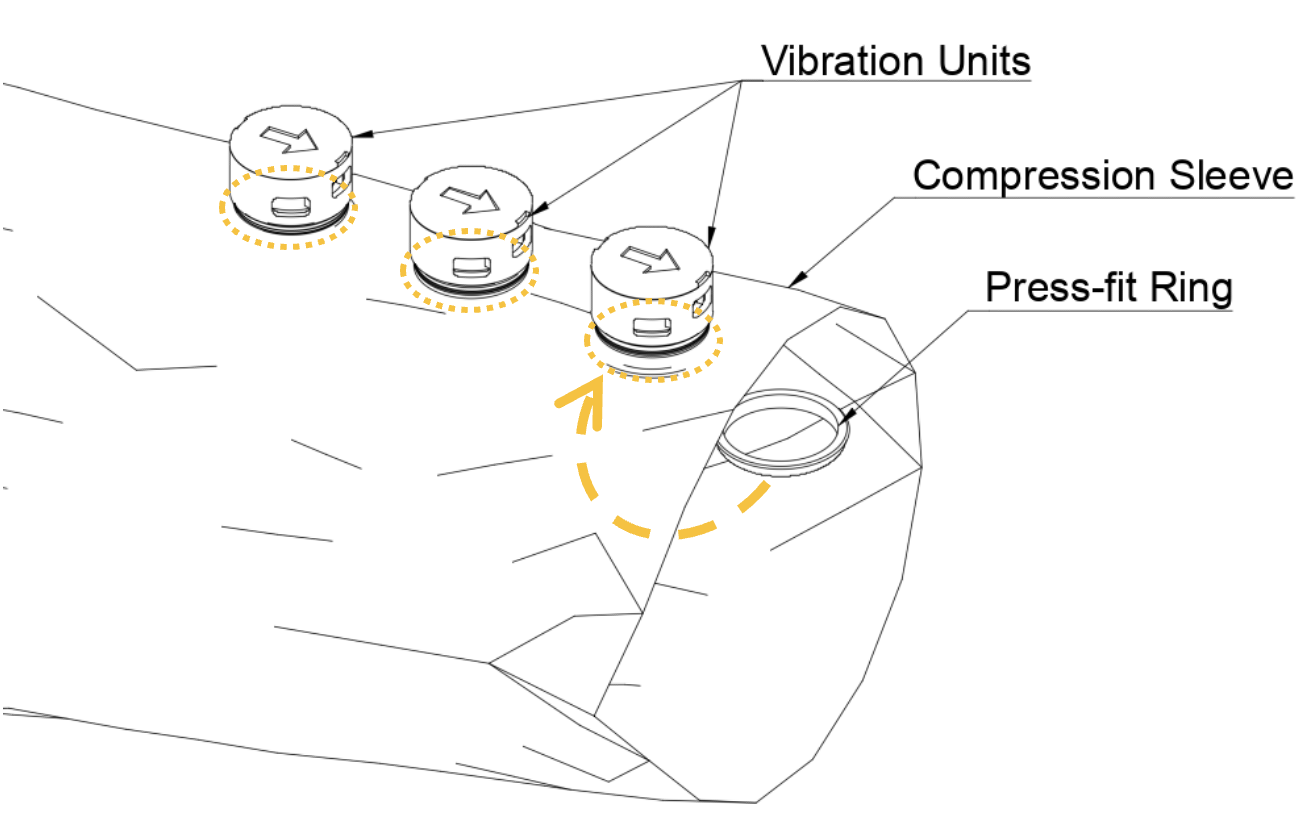
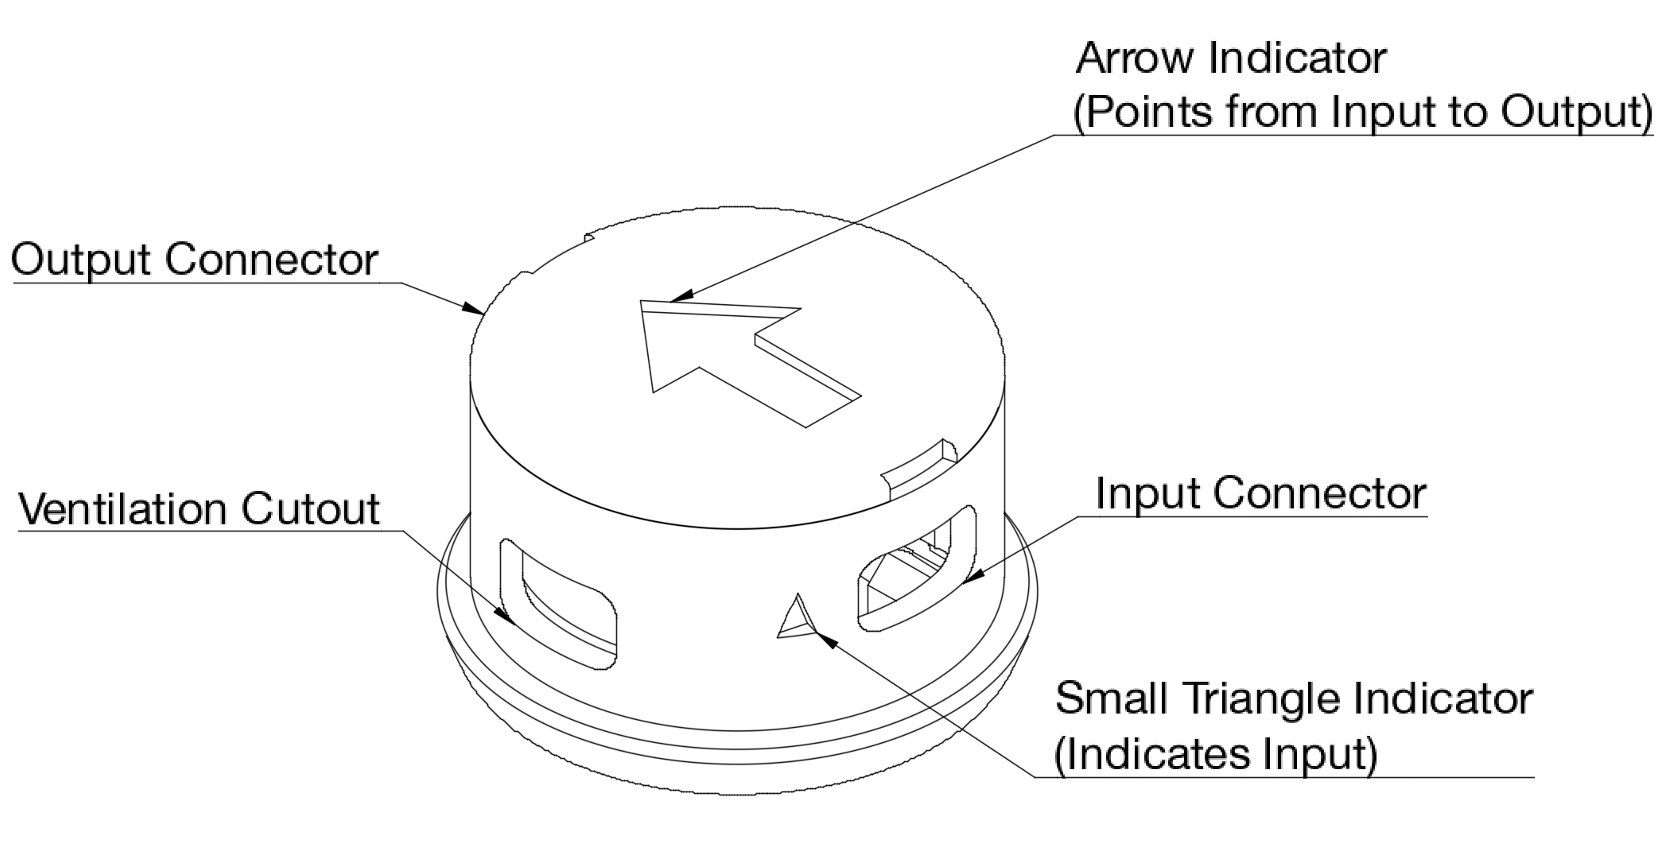
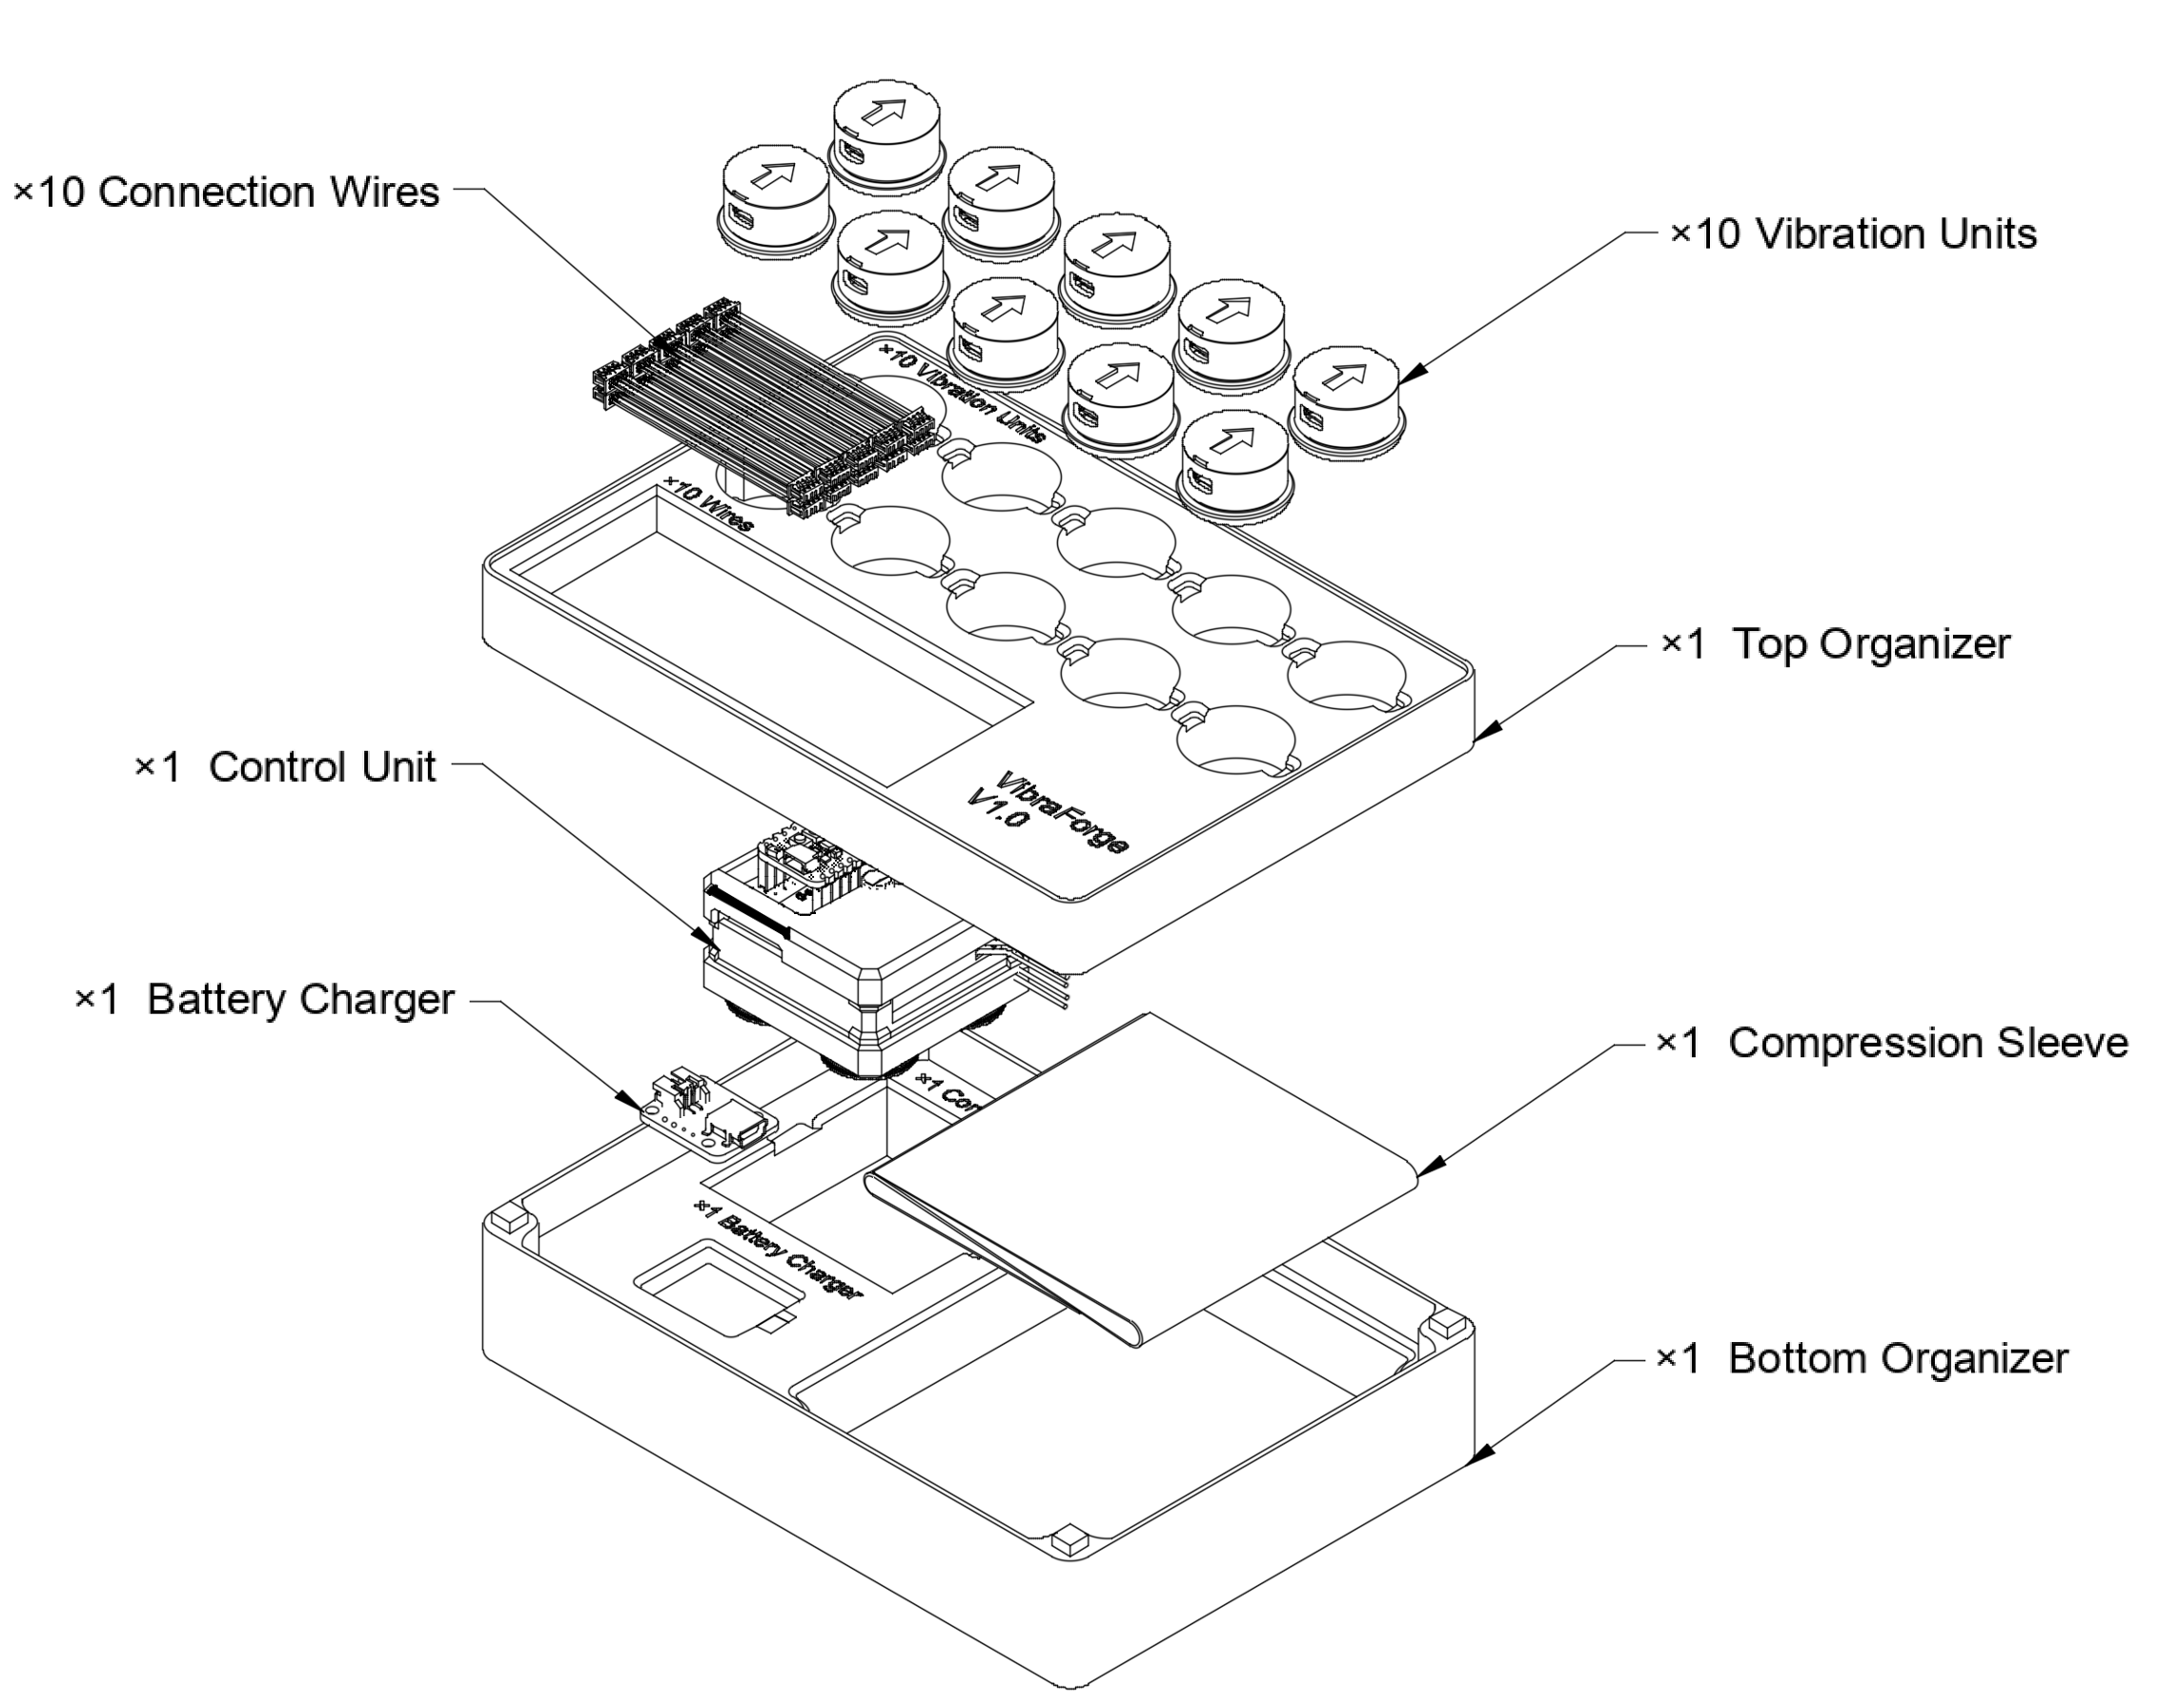
Modular Wearable Design

Snap-fit actuators — no sewing needed.

Toolkit for R&D

Ideal for VR, illusions, phoneme mapping, and robotics feedback.

Examples & Applications

Phoneme Display

Mapping speech phonemes to tactile signatures.

VR Fitness Jacket

Impact cues, directional hits, rhythmic vibration patterns.

Drone Teleoperation (AeroHaptix)

Spatial perception via vibration — direction, distance, urgency.

GUI Editor

A fully featured editor for designing, previewing, and streaming spatial vibrotactile patterns — all in real time.

GUI Screenshot

Assembly & Quick Start

Follow these steps to assemble your VibraForge Dev Kit v1 and start playing spatialized vibrotactile patterns. For full details, see the VibraForge User Manual (PDF). Assembly walkthrough video: Watch on YouTube → Open-source software & examples: VibraForge GitHub Repository →

Control Unit

Step 1 — Power the Control Unit

Connect the Li-Po battery to the Li-Po Battery Connector at the top of the control unit. A green LED will turn on to confirm power. We recommend starting with Connector 1 for the first vibration chain.

Vibration Unit

Step 2 — Understand the Vibration Units

Each vibration unit has an input and output connector. The arrow on the cap indicates the connection direction from input to output. Do not reverse this direction, or the driver board may be damaged due to a short circuit.

Chain Connection

Step 3 — Connect Units into Chains

Daisy-chain vibration units together using the included cables. Each chain supports up to 16 units, addressed from 0…15 (e.g., the first chain has units 0,1,2,…,15). Connect the chain to Connector 1 on the control unit for the default setup.

Attach Units to Sleeve

Step 4 — Attach Units to the Sleeve

Slide each vibration unit onto the compression sleeve, place the press-fit ring underneath, and press the parts together until they lock securely. Repeat for all units in your pattern.

GUI Layout

Step 5 — Run the Software & Have Fun

Once the hardware is connected, use the open-source software from the VibraForge GitHub repo to play patterns:

  • Quick test: Software_Design/Python_Server/Python_Test.py pip install bleakpython Python_Test.py
  • GUI editor: GUI_Editor/main_app/app.py pip install PyQt6 numpy matplotlib scipy bleakpython app.py

Papers

VibraForge: A Scalable Prototyping Toolkit

Huang, Ren, Luo, Cheng, Cai, Sang, Sousa, Dietz, Wigdor (2024)

Read Paper →

AeroHaptix: Vibrotactile Feedback for UAV Collision Avoidance

Huang, Wang, Cheng, Ren, Cai, Alvarez Valdivia, Mahadevan, Wigdor (2024)

Read Paper →

Join the Community — Get a Free VibraForge Toolkit

We're building a growing community of researchers, creators, engineers, and designers exploring spatial vibrotactile feedback. Contribute your ideas, experiments, or feedback — and receive a chance to get a FREE VibraForge Dev Kit as a thank-you for helping us push the field forward.

Want to participate?

Fill out this short form to tell us about your interests, research area, or project ideas. Selected contributors will receive early-access hardware, software updates, and feature testing opportunities.

Apply to Receive a Free Toolkit →